Person Detection ML Application
Description
The UC Person Detection application is designed to identify and locate persons within its field of view. It leverages object detection techniques to generate bounding boxes around detected individuals and assigns confidence scores to indicate the reliability of each detection. The output includes the precise location of each person in the image along with a confidence value, enabling accurate and efficient person recognition for various embedded vision applications. This example supports both WQVGA(480x270) and VGA(640x480) resolutions.
Build Instructions
Prerequisites
Configuration and Build Steps
Select Default Configuration
make cm55_person_detection_defconfigThis configuration uses WQVGA resolution by default.
Optional Configuration:
💡Tip: Run
make menuconfigto modify the configuration via a GUI.Configuration
Menu Navigation
Action
VGA Resolution
COMPONENTS CONFIGURATION → Off Chip Components → Display ResolutionChange to
VGA(640x480)WQVGA in LP Sense
COMPONENTS CONFIGURATION → DriversEnable
MODULE_LP_SENSE_ENABLEDStatic Image
COMPONENTS CONFIGURATION → Off Chip ComponentsDisable
MODULE_IMAGE_SENSOR_ENABLEDBuild the Application The build process will generate the required
.elfor.axffiles for deployment.make build or make
Deployment and Execution
Setup and Flashing
Open the VSCode SRSDK Extension and connect to the Debug IC USB port on the Astra Machina Micro Kit. For detailed steps refer to the Quick Start Kit.
Generate Binary Files
FW Binary generation
Navigate to AXF/ELF TO BIN → Bin Conversion in SRSDK VSCode Extension
Load the generated
sr110_cm55_fw.elforsr110_cm55_fw.axffileClick Run Image Generator to create the binary files
Model Binary generation (to place the Model in Flash)
To generate
.binfile for TFLite models, please refer to the Vela compilation guide.
Flash the Application
To flash the application:
Navigate to IMAGE LOADING in the SRSDK VSCode Extension.
Select SWD/JTAG as the service type.
Choose the respective image bins and click Flash Execute.
For WQVGA resolution:
Flash the generated
B0_flash_full_image_GD25LE128_67Mhz_secured.binfile directly to the device. Note: Model weights is placed in SRAM.
For VGA resolution:
Flash the pre-generated model binary:
person_detection_flash(448x640).bin. Due to memory constraints, need to burn the Model weights to Flash.Location:
examples/vision_examples/uc_person_detection/models/Flash address:
0x629000Calculation Note: Flash address is determined by the sum of the
host_imagesize and theimage_offset_SDK_image_B_offset(parameter, which is defined withinNVM_data.json). It’s crucial that the resulting address is aligned to a sector boundary (a multiple of 4096 bytes).This calculated resulting address should then be assigned to theimage_offset_Model_A_offsetmacro in yourNVM_data.jsonfile.
Flash the generated
B0_flash_full_image_GD25LE128_67Mhz_secured.binfile
Refer to the Astra SRSDK VSCode Extension User Guide for detailed instructions on flashing.
Device Reset Reset the target device after flashing is complete.
Note:
The placement of the model (in SRAM or FLASH) is determined by its memory requirements. Models that exceed the available SRAM capacity, considering factors like their weights and the necessary tensor arena for inference, will be stored in FLASH.
Running the Application
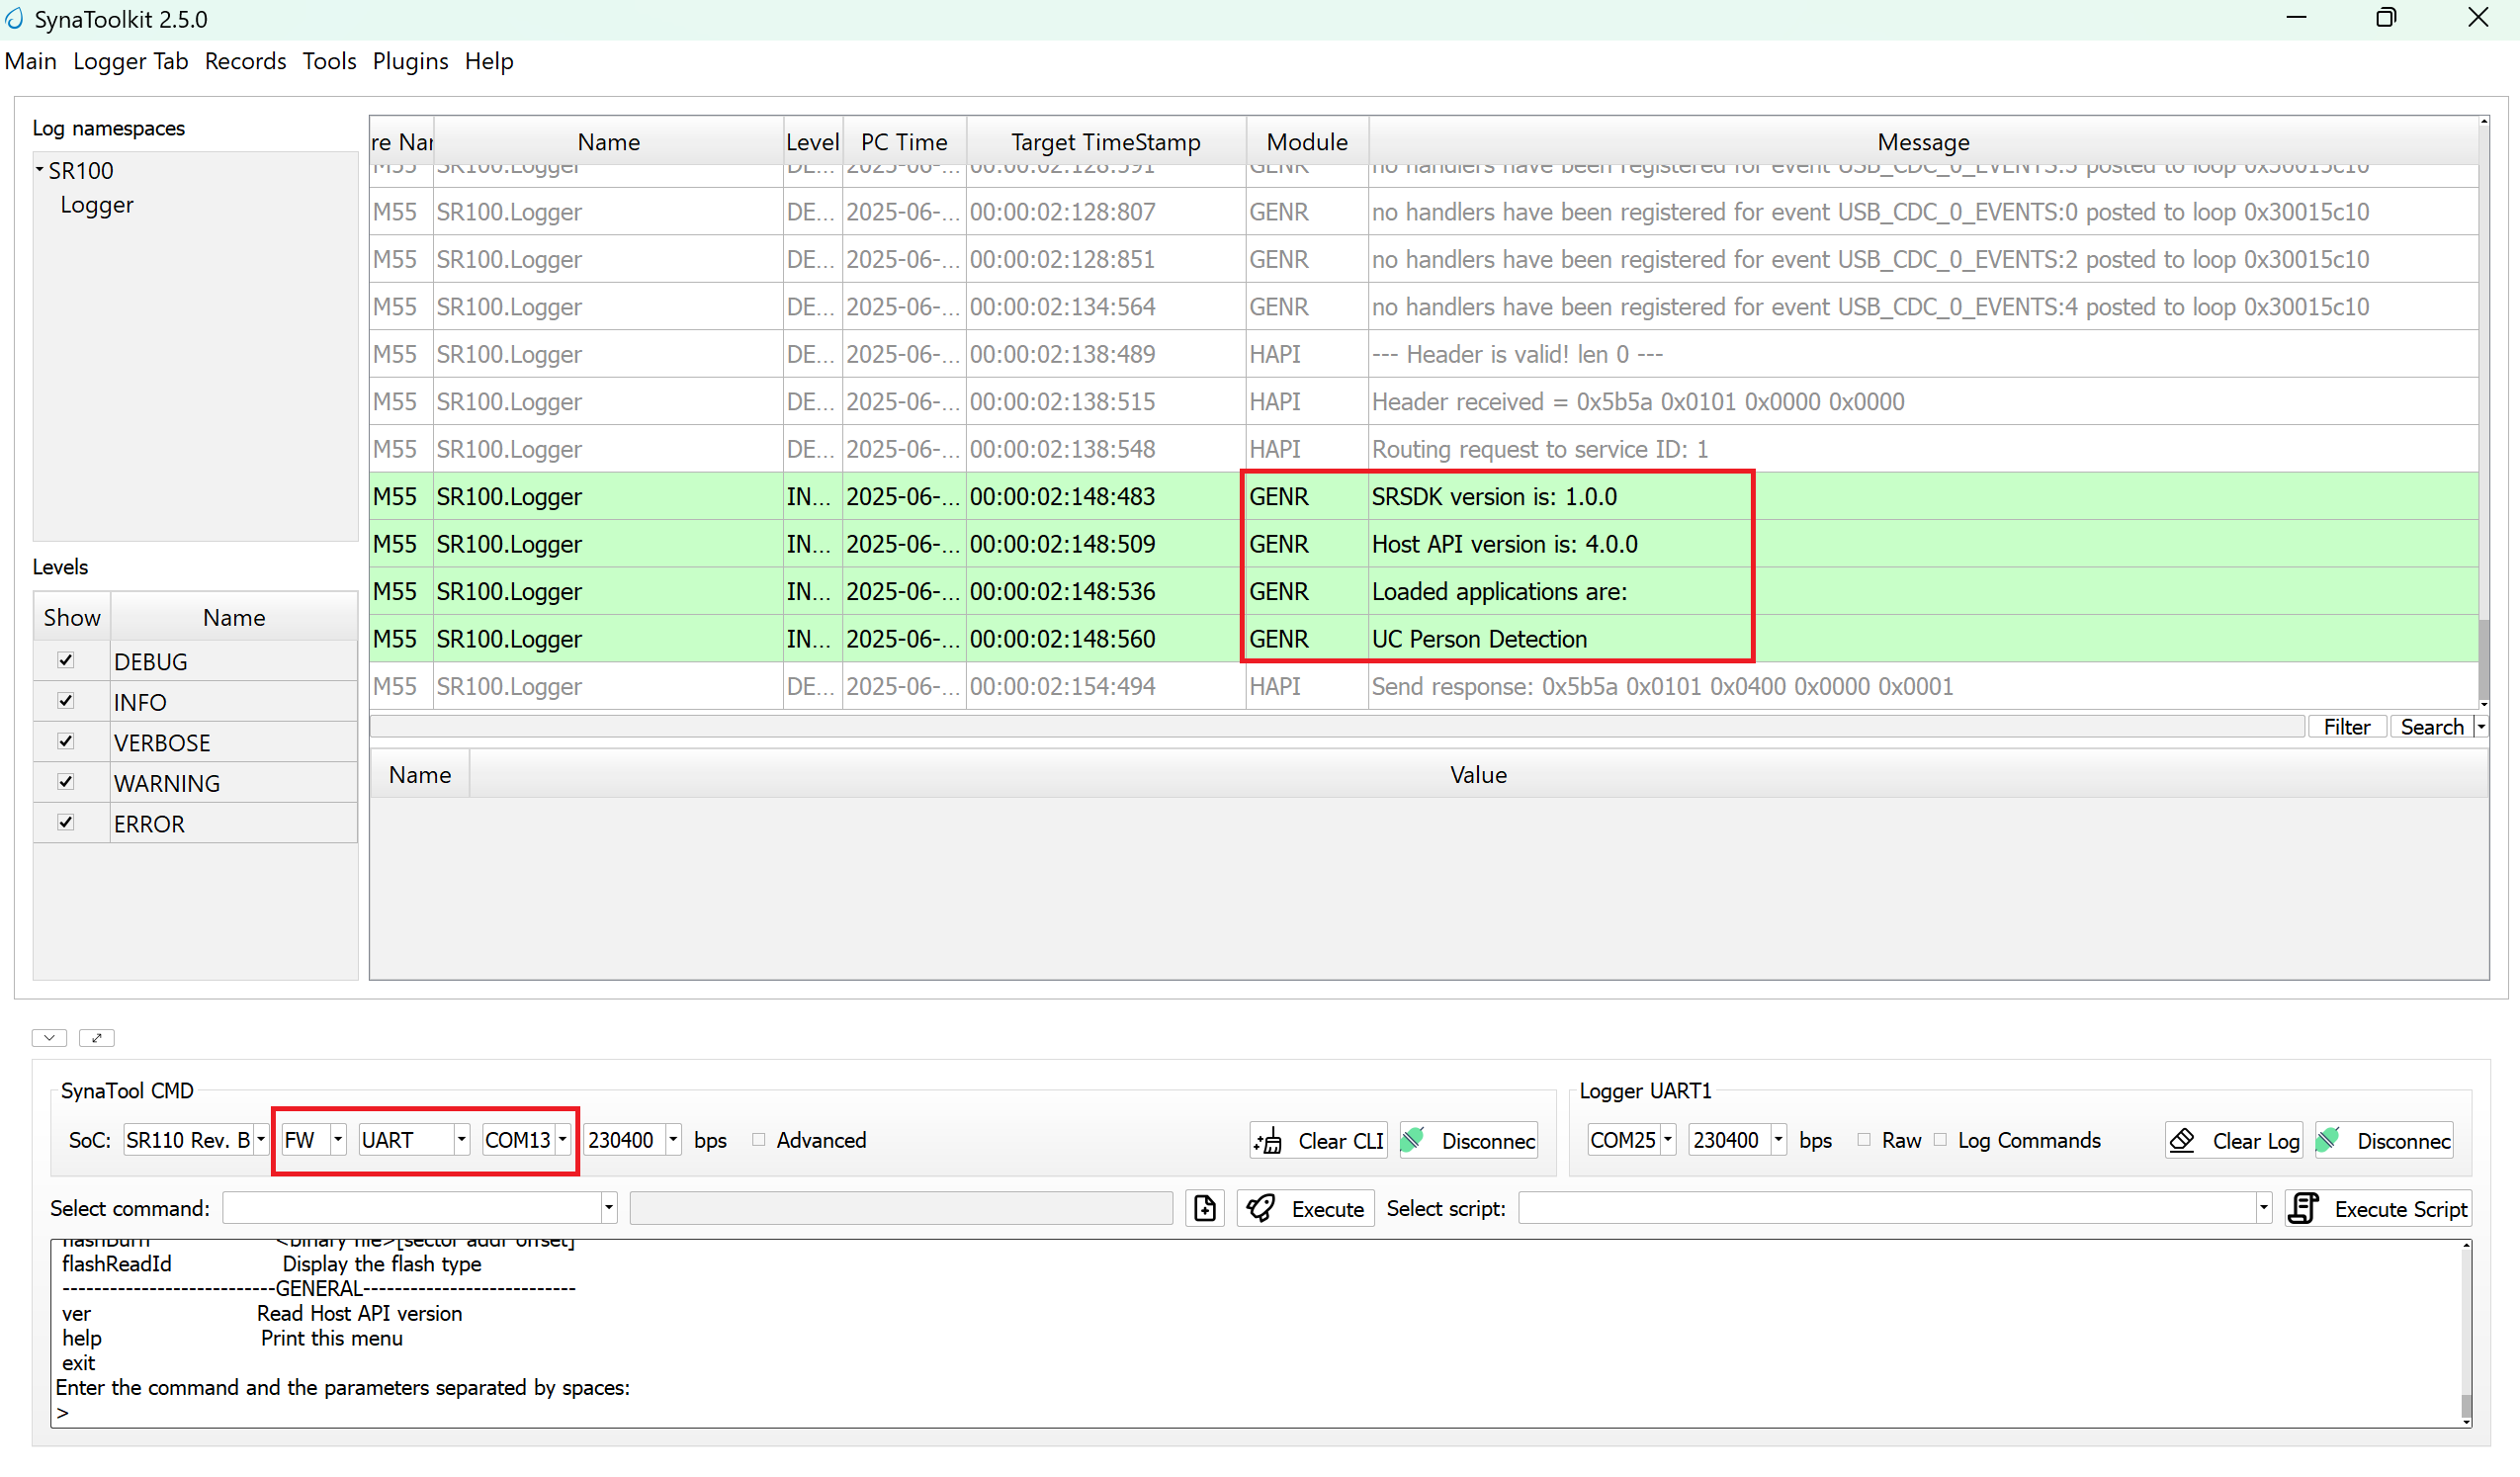
Open SynaToolkit_2.5.0
Before running the application, make sure to connect a USB cable to the Application SR110 USB port on the Astra Machina Micro board and then press the reset button
Connect to the newly enumerated COM port
For logging output, connect to DAP logger port

The example logs will then appear in the logger window.
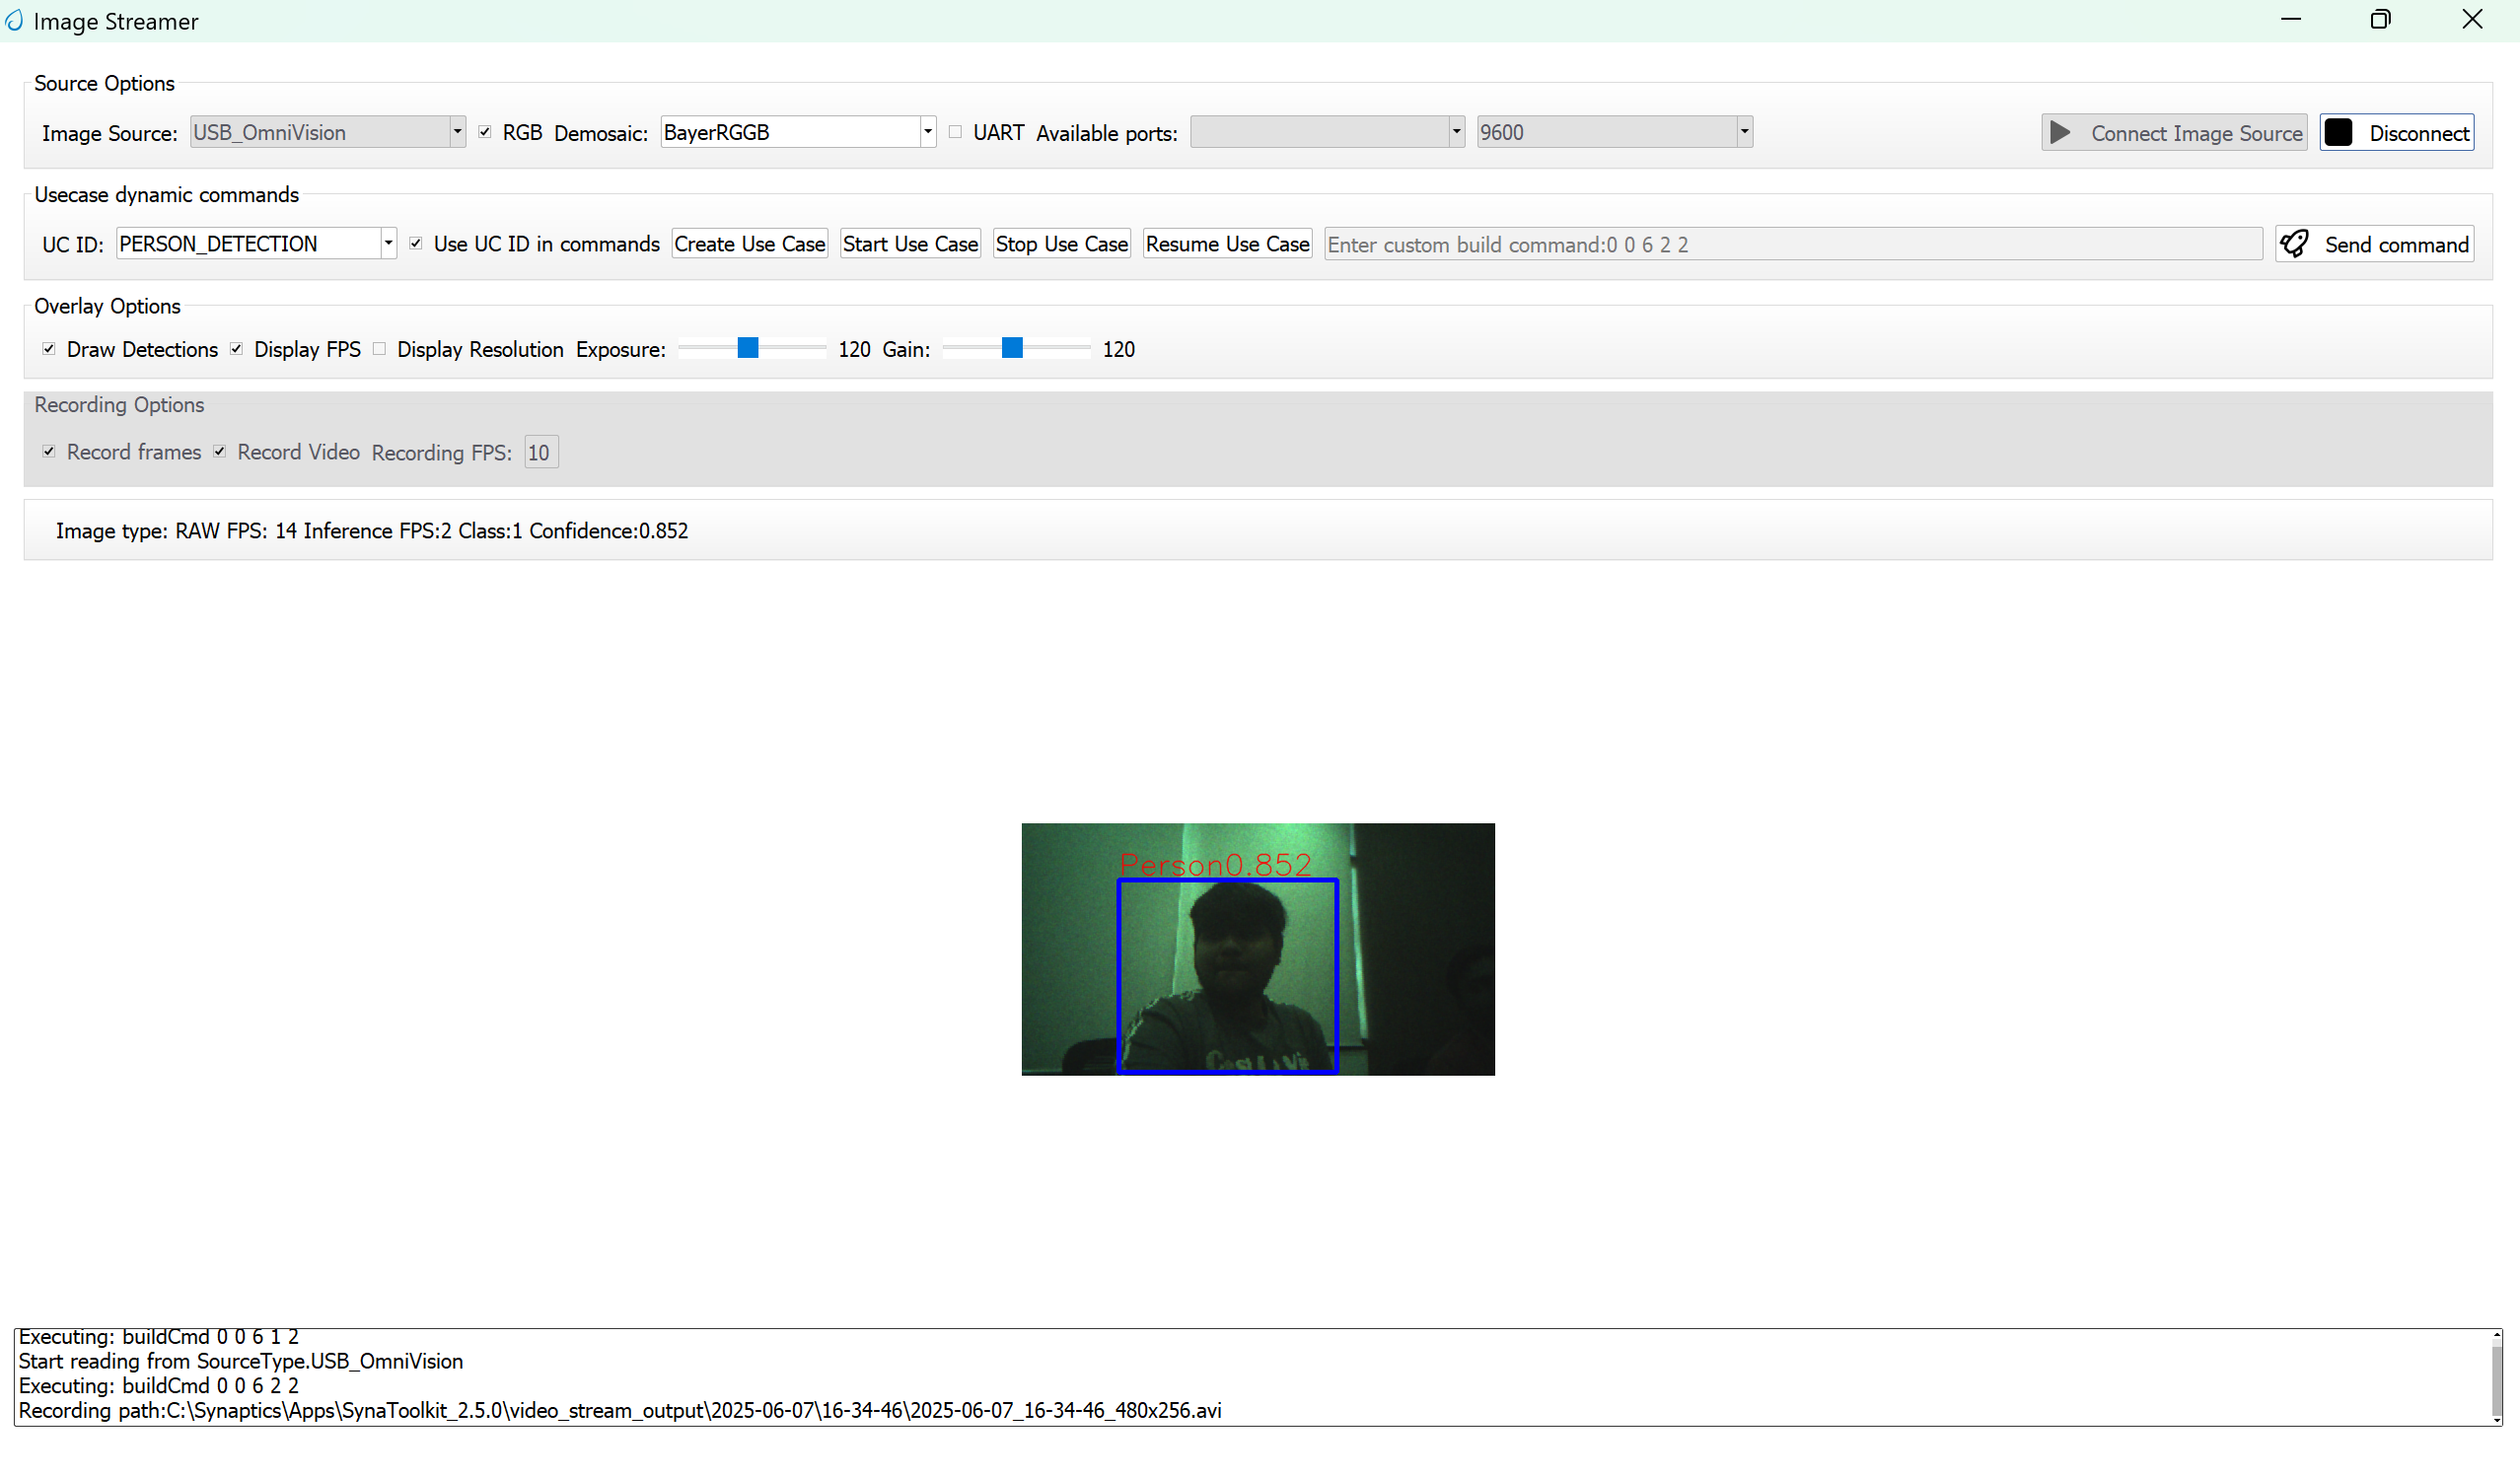
Next, navigate to Tools → Video Streamer in SynaToolkit to run the application.
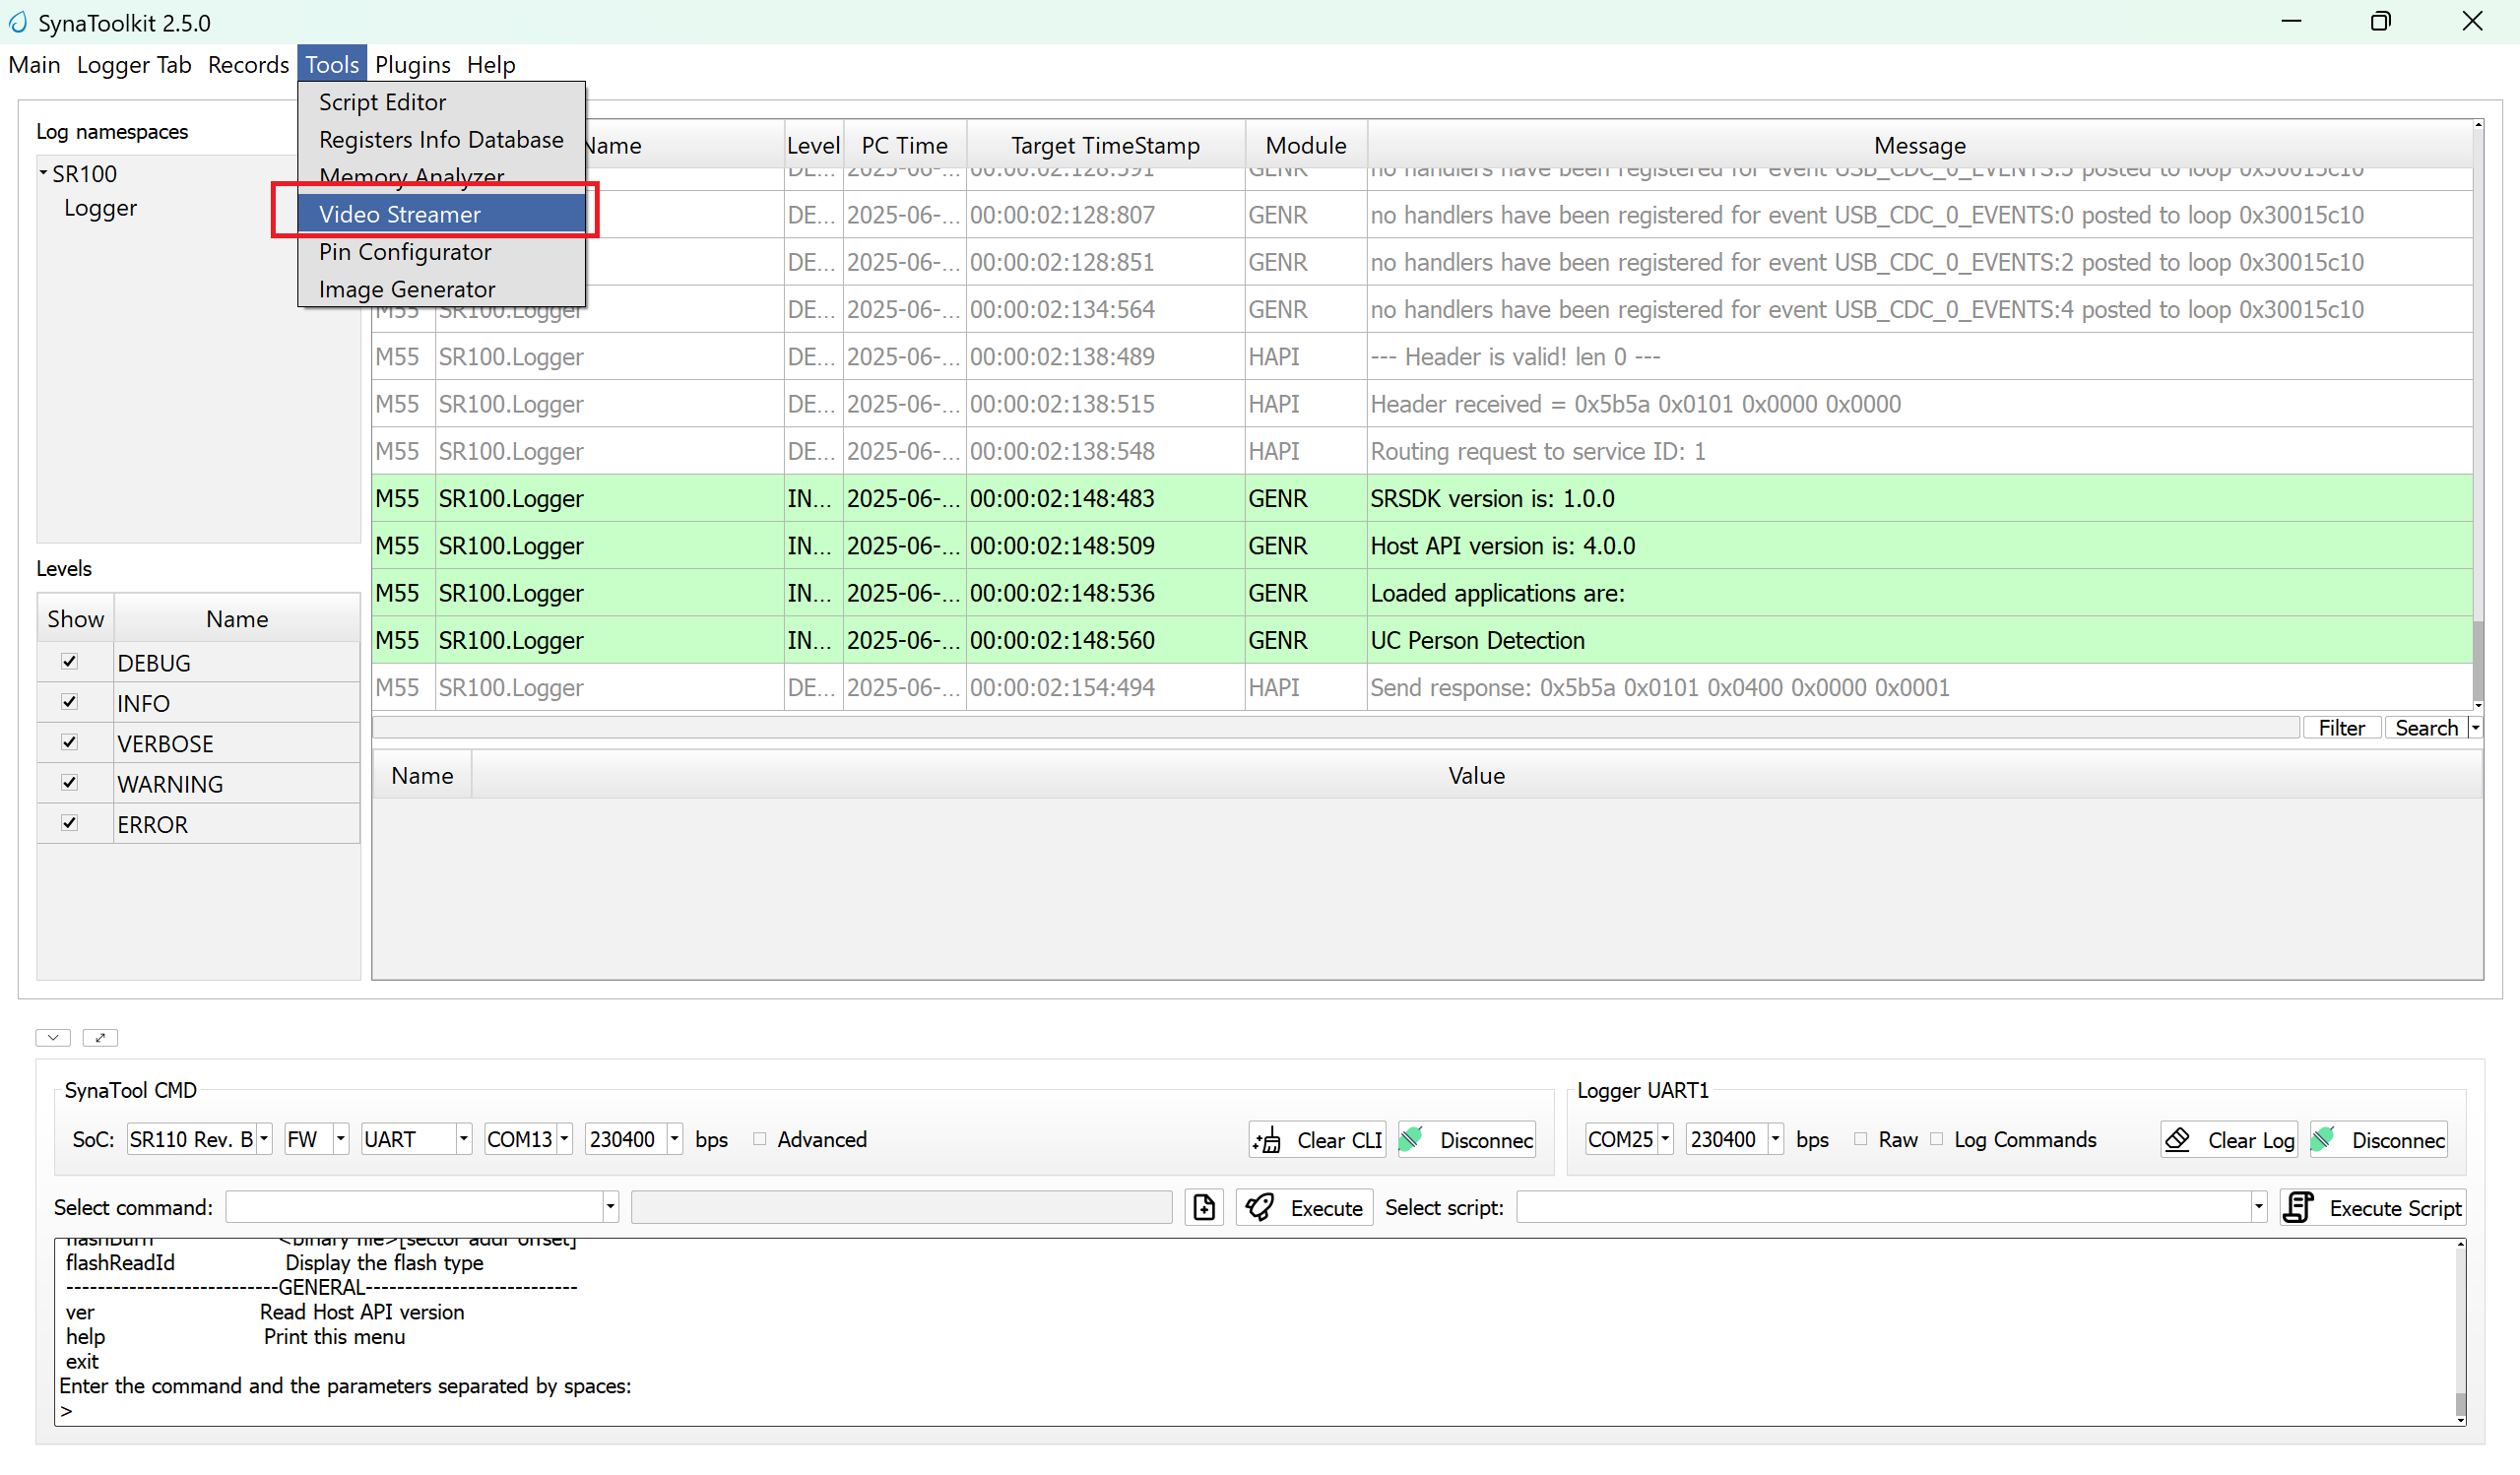
Video Streamer
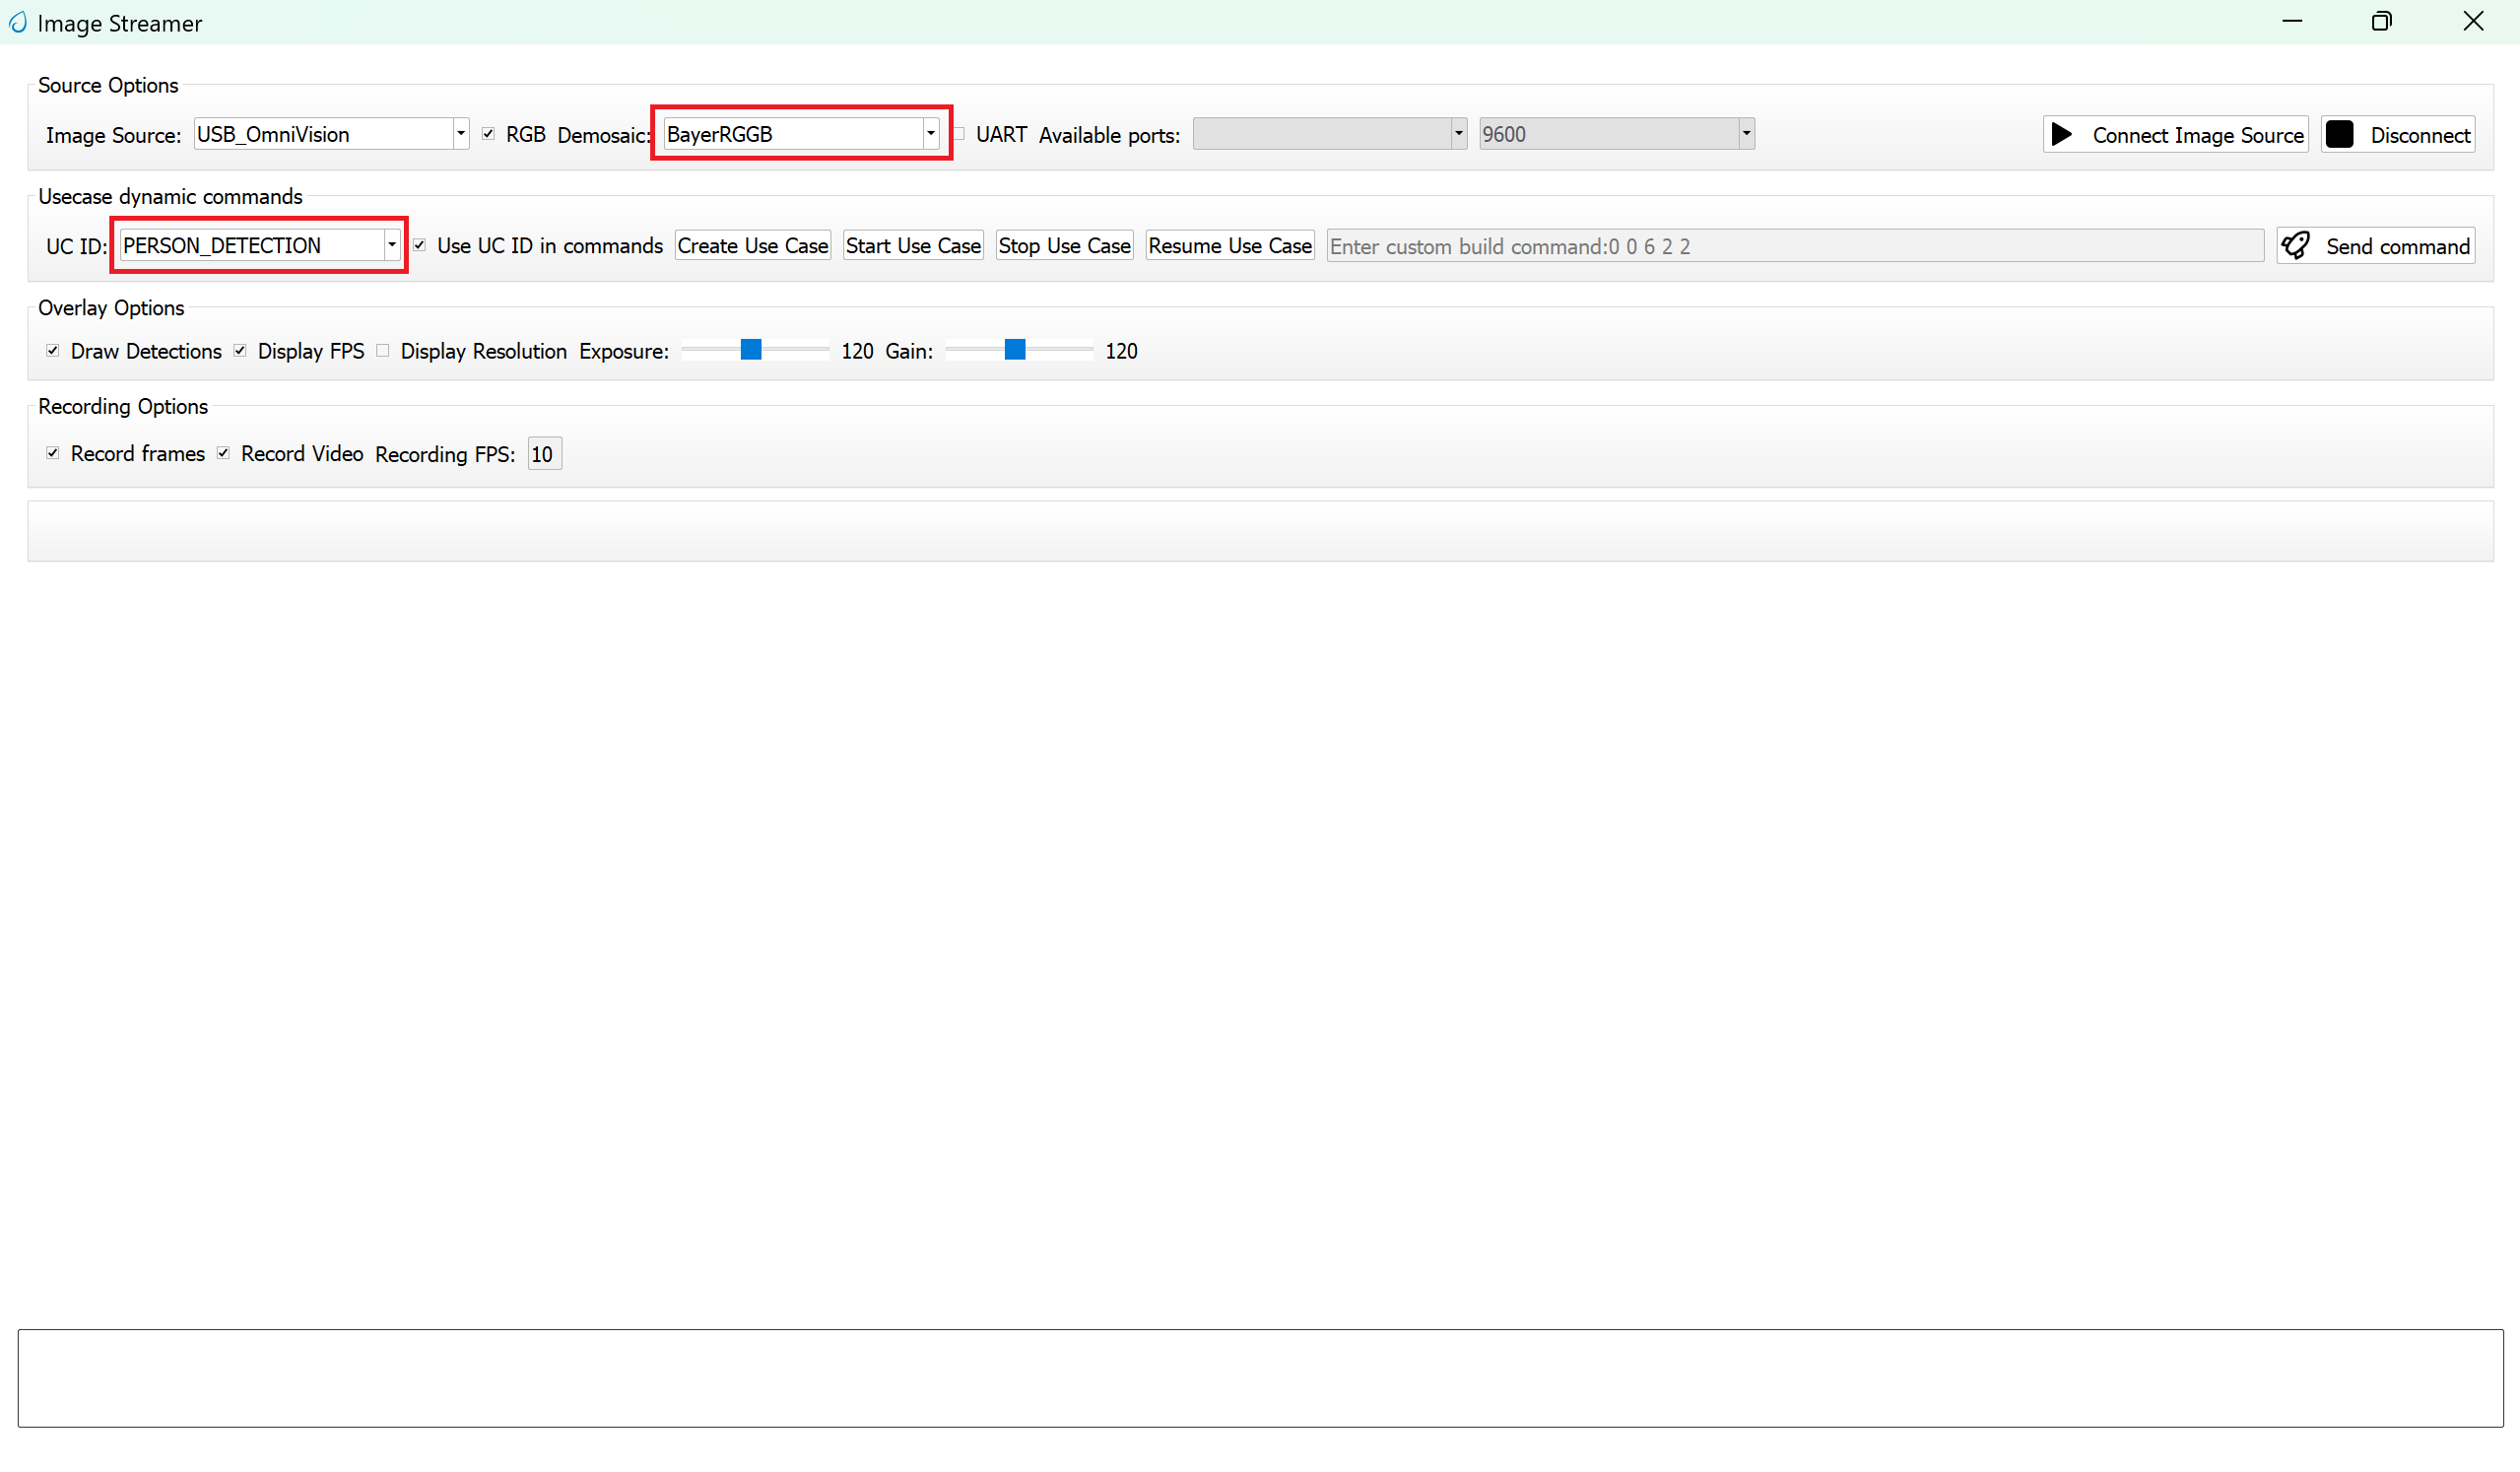
Configure the following settings:
UC ID: PERSON_DETECTION
RGB Demosaic: BayerRGGB
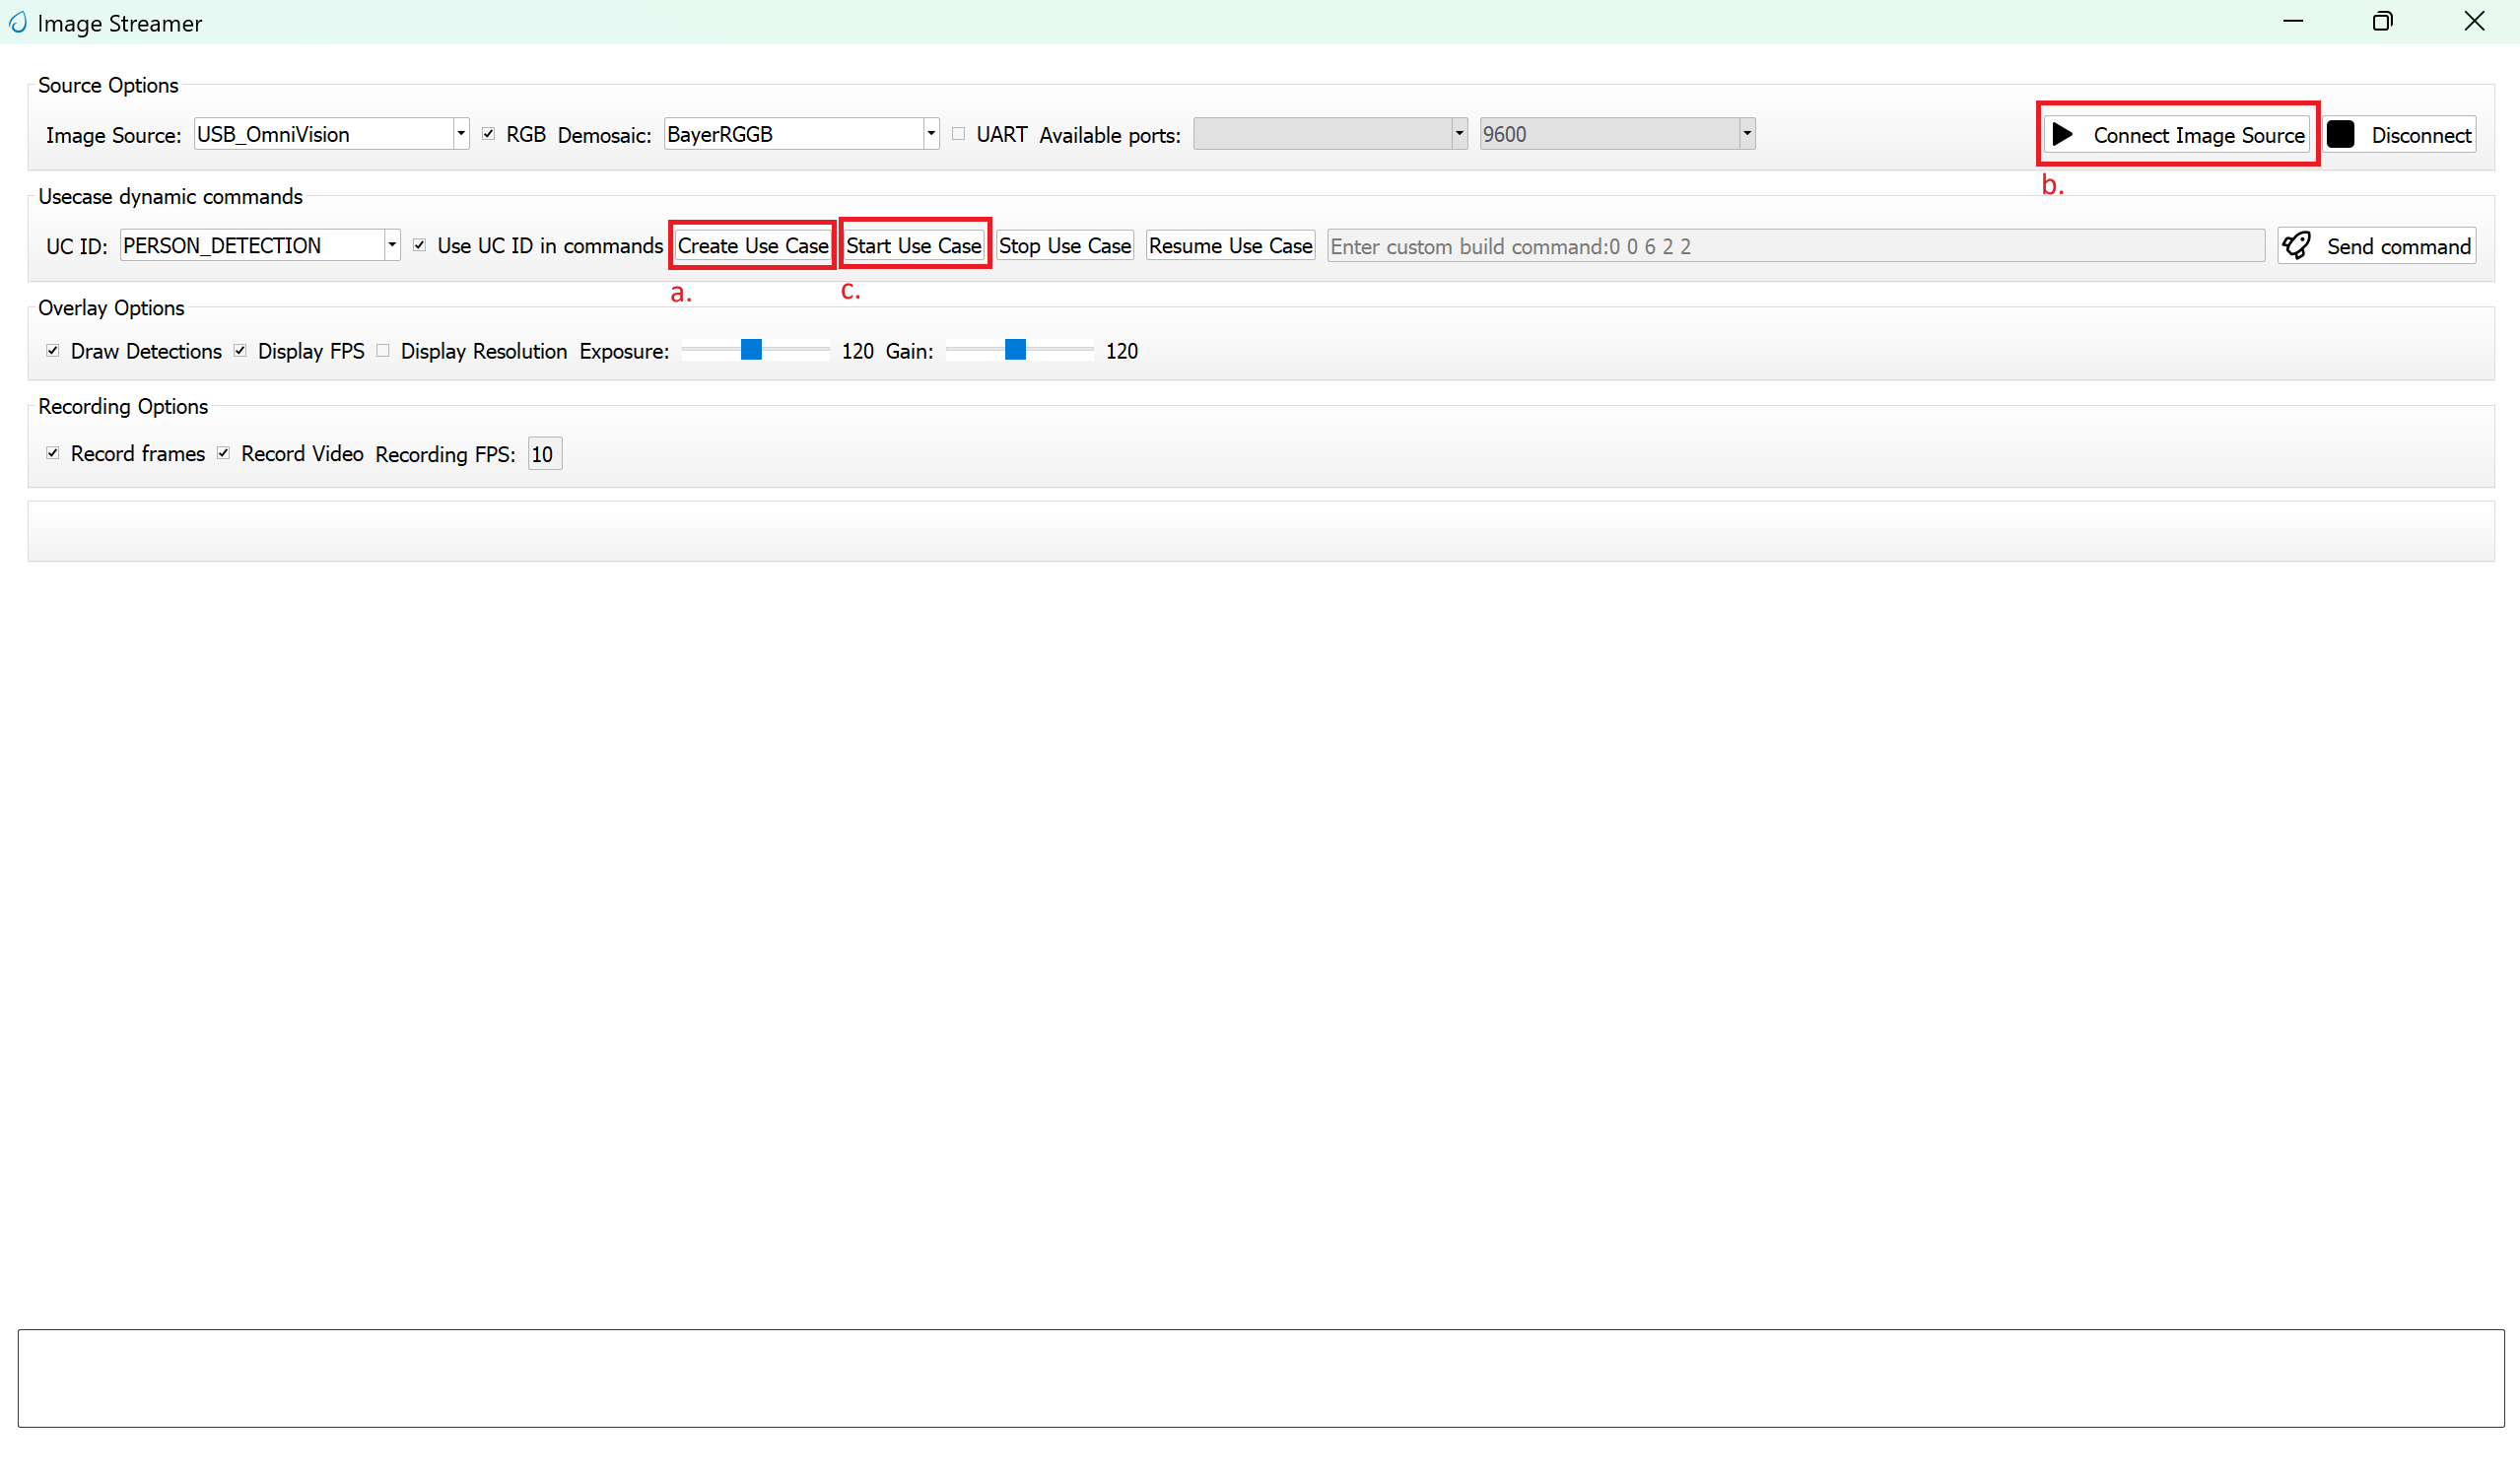
Click Create Usecase
Connect the image source
Click Start Usecase to begin real-time detection
After starting the use case, Person detection will begin streaming video as shown below.
Adapting Pipeline for Custom Object Detection Models
This person detection pipeline can be adapted to work with custom object detection models. However, certain validation steps and potential modifications are required to ensure compatibility.
Prerequisites for Model Compatibility
Before adapting this pipeline for another object detection model, you must verify the following:
1. Model Format Requirements
Your object detection model should be in
.tfliteformatThe model should produce similar output tensor structure (bounding boxes, confidence scores)
2. Vela Compiler Compatibility Check
Step 1: Analyze Original Model
Load your
object_detection_model.tflitefile in NetronDocument the output tensors:
Tensor names
Tensor identifiers/indexes
Quantization parameters (scale and offset values)
Tensor dimensions
Step 2: Compile with Vela
Pass your model through the Vela compiler to generate
model_vela.binormodel_vela.tfliteAnalyze the Vela-compiled model in Netron using the same steps as above
Step 3: Compare Outputs Compare the following between original and Vela-compiled models:
Output tensor indexes/identifiers: Verify if they remain in the same order
Quantization parameters: Check if scale and offset values are preserved
Tensor dimensions: Ensure dimensions match your expected output format
Pipeline Adaptation Process
Case 1: No Changes Required
If the Vela compilation preserves:
✅ Output tensor indexes in the same order
✅ Same quantization scale and offset values
Result: You can proceed with the existing pipeline without modifications.
Case 2: Modifications Required
If the Vela compilation changes:
❌ Output tensor index order
❌ Quantization parameters
Required Actions: Modify the pipeline code as described below.
Code Modifications
If your model’s output tensor indexes change after Vela compilation, you need to update the tensor parameter assignments in uc_person_detection.c:
Location: detection_post_process function
Original Code:
g_box1_params = &g_all_tens_params[0];
g_box2_params = &g_all_tens_params[1];
g_cls_params  = &g_all_tens_params[2];
Modified Code: Update the array indexes according to your Vela-compiled model’s output tensor identifiers:
// Example: If your model_vela output has different tensor order
g_box1_params = &g_all_tens_params[X];  // Replace X with actual index from Netron
g_box2_params = &g_all_tens_params[Y];  // Replace Y with actual index from Netron
g_cls_params  = &g_all_tens_params[Z];  // Replace Z with actual index from Netron