AUDIO MIC Application
Description
The UC_AUDIO_MIC use case demonstrates the seamless routing of audio data from the Microphone Digital Data Format (DDF) to both the I2S interface and LP_Sense memory. It serves as a reference implementation for validating audio data compatibility across interfaces and can be effectively utilized by following the build, run, and results guidelines provided.
The latest example structure uses a common application source tree with board-specific hardware setup kept under hw/<BOARD>/. For this app:
Common application sources such as
main.c,uc_audio_mic.c, anduc_audio_mic.hstay in the app root.Application defconfigs are stored under
configs/.Board and hardware-specific setup is selected from
hw/<BOARD>/, for examplehw/SR110_RDK/.
The application can also be exported and built as a standalone app repository. In that flow, keep this app in its own directory, point SRSDK_DIR to the SDK root, and build from the app directory itself. For the full application workflow model, see Astra MCU SDK User Guide.
Supported Boards
This application supports:
SR110_RDK
Select the defconfig that matches your target board, and the build system will pick the corresponding board-specific hardware setup from hw/<BOARD>/.
Note: The audio use case involves getting DMIC input and converting it to PCM data in I2S format. Since the on-board doesn’t have DAC, we need to interface the signals in 40 pin header(J25.3, J25.4, J25.5) with an external board that supports DAC, thereby achieving audio output at the speaker.
Prerequisites
Choose one setup path:
Test Case Selection
Before building, choose the testcase defconfig that matches both your target board and the transfer mode you want to validate.
You can:
Select the required defconfig directly from the application’s
configs/directory.Run
make list_defconfigsfrom the application directory to list all supported defconfigs.
Available defconfigs:
sr110_rdk_cm55_audio_mic_defconfig
Building and Flashing the Example using VS Code and CLI
Use the VS Code flow described in the SR110 guide and the VS Code Extension guide:
Build (VS Code):
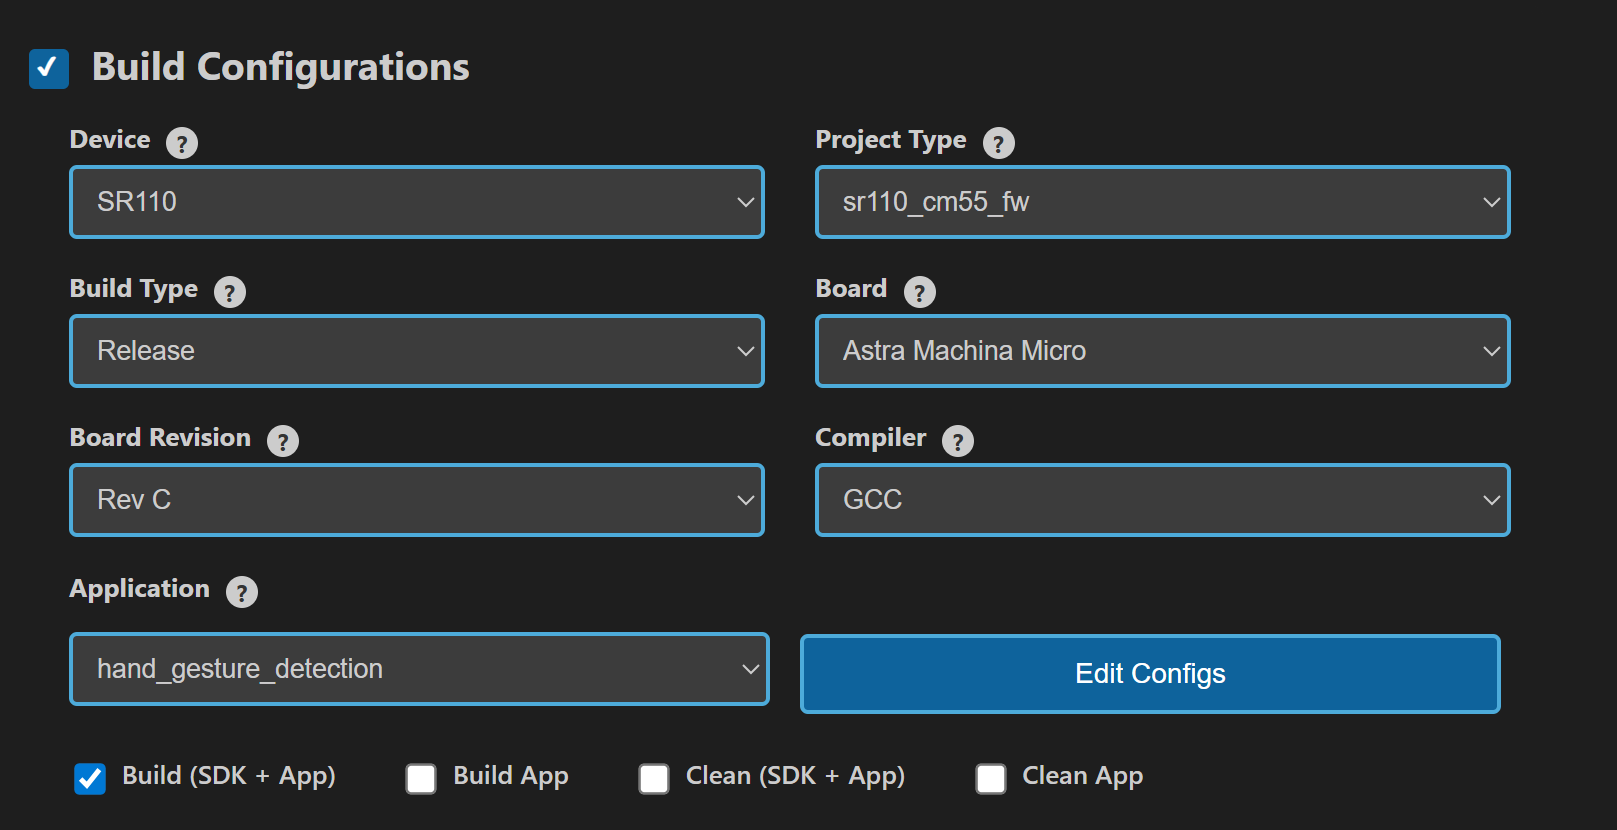
Open Build and Deploy → Build Configurations.
Select the audio_mic project configuration in the Project Configuration dropdown.
Build with Build (SDK+Project) for the first build, or Build (Project) for rebuilds.
Build (CLI):
Build from the application directory itself:
cd <sdk-root>/examples/audio_examples/uc_audio_mic
export SRSDK_DIR=<sdk-root>
make <app_defconfig> BUILD=SRSDK
Rebuild the application using the pre-built package:
cd <sdk-root>/examples/audio_examples/uc_audio_mic
make build
CLI build outputs
The build process will produce the necessary .elf or .axf files for deployment with the installed package.
Flash and Image Generation (VS Code):
Open the Astra MCU SDK VS Code Extension and connect to the Debug IC USB port on the Astra Machina Micro Kit.
Refer to the Astra MCU SDK User Guide for detailed setup steps.
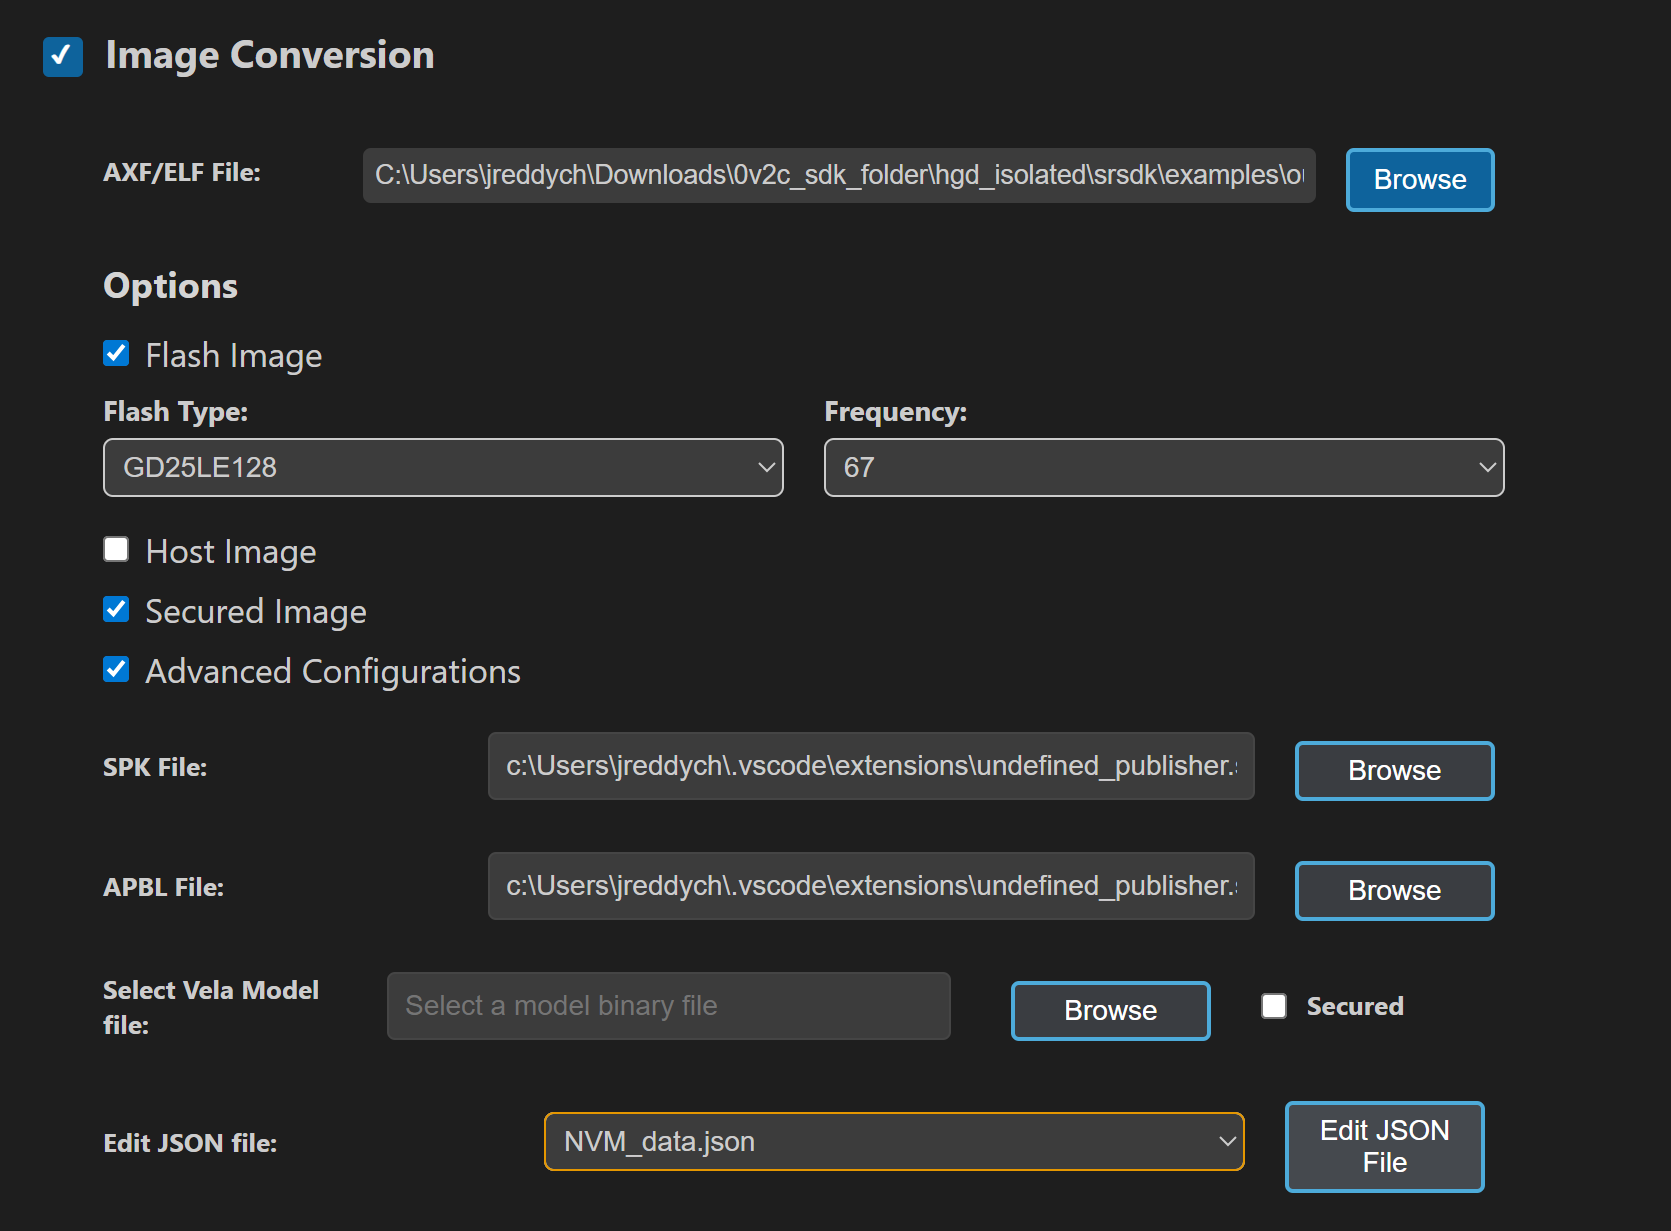
Generate firmware binaries using Build and Deploy → Image Conversion.
Select the required
.axfor.elffile. If the use case is built using the VS Code extension, the file path will be auto-populated.
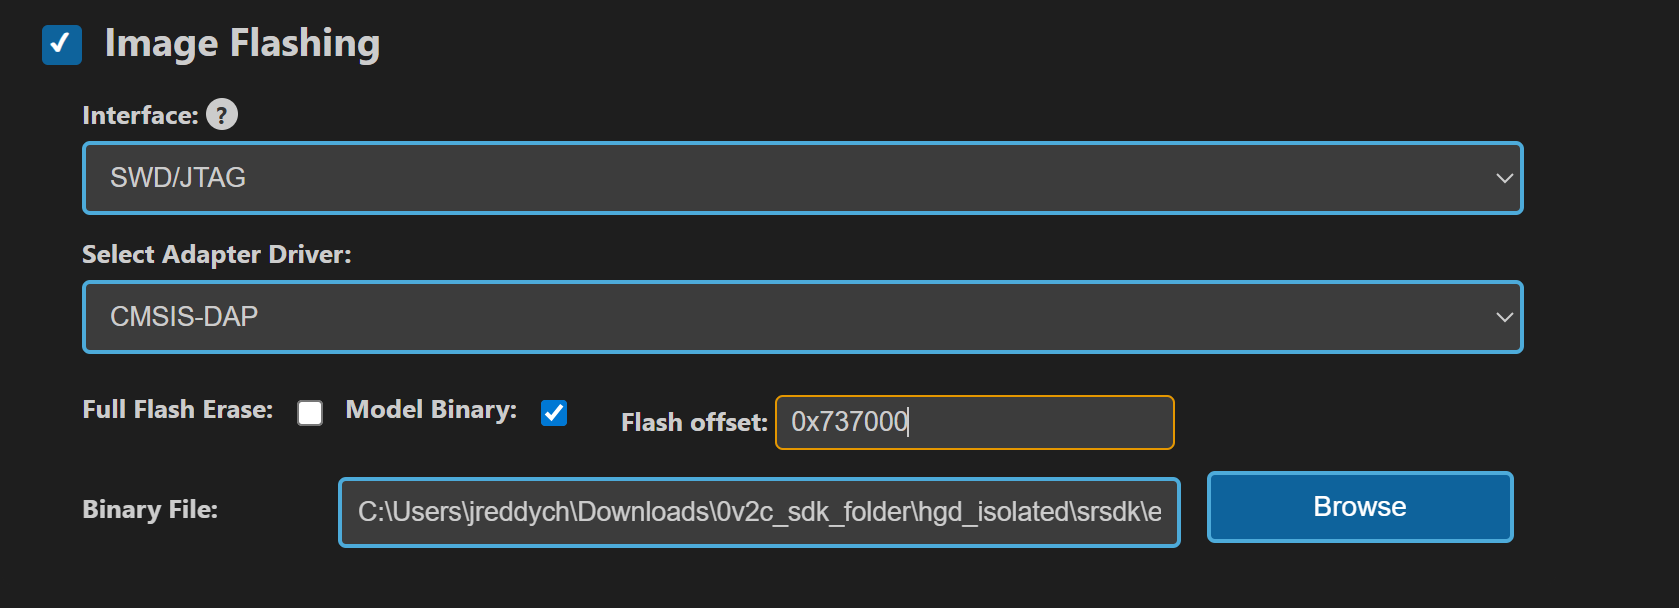
Flash the application using Build and Deploy → Image Flashing.
Select SWD/JTAG as the interface.
Choose the respective image bins and click Run.
Flash (CLI):
Activate the SDK venv (required for image generation tools):
# Linux/macOS
source <sdk-root>/.venv/bin/activate
# Windows PowerShell
.\.venv\Scripts\Activate.ps1
Generate flash image:
cd <sdk-root>/tools/srsdk_image_generator
python srsdk_image_generator.py \
  -B0 \
  -flash_image \
  -sdk_secured \
  -spk "<sdk-root>/tools/srsdk_image_generator/Inputs/spk_rc4_1_0_secure_otpk.bin" \
  -apbl "<sdk-root>/tools/srsdk_image_generator/Inputs/sr100_b0_bootloader_ver_0x012F_ASIC.axf" \
  -m55_image "<sdk-root>/examples/audio_examples/uc_audio_mic/out/sr110_cm55_fw/release/sr110_cm55_fw.elf" \
  -flash_type "GD25LE128" \
  -flash_freq "67"
Flash the application:
cd <sdk-root>
python tools/openocd/scripts/flash_xspi_tcl.py \
  --cfg_path tools/openocd/configs/sr110_m55.cfg \
  --image tools/srsdk_image_generator/Output/B0_Flash/B0_flash_full_image_GD25LE128_67Mhz_secured.bin \
  --erase-all
Running the Application
Open SynaToolkit_2.6.0
Before running the application, make sure to connect a USB cable to the Application SR110 USB port on the Astra Machina Micro board and then press the reset button
Connect to the newly enumerated COM port
For logging output, connect to DAP logger port
Enter the build command and Execute
The following build commands can be used to create, start, stop, and kill the use case.
• buildcmd 0 1 6 1 12 – Create
• buildcmd 0 1 6 2 12 – Start

• buildcmd 0 1 6 3 12 – Stop

• buildcmd 0 1 6 5 12 – Kill